Dynamic Mesh Painting in Unreal Engine 4
In this Unreal Engine 4 tutorial, you will learn how to paint colors onto any type of mesh. By Tommy Tran.
Unwrapping the Character
For this tutorial, the capture Blueprint will handle the unwrapping and capturing. First, you will need a dynamic instance of the unwrap material. Navigate to the Blueprints folder and open BP_Capture. Afterwards, add the highlighted nodes to Event BeginPlay. Make sure you set Parent to M_Unwrap.

Next, you need a function to perform the unwrap and capture. Create a new function named PaintActor. Afterwards, create the following inputs:
- ActorToPaint: Type is Actor. The actor to unwrap and capture.
- HitLocation: Type is Vector. This will be the center point of the sphere mask.
- BrushRadius: Type is Float. The radius of the sphere mask in world units.

Although this painting method can work with any actor, we will only check if the incoming actor inherits from the Character class. And for code simplicity, we’ll store the character’s skeletal mesh component into a variable since you will need to reference it a few times. To do this, add the highlighted nodes:

Now it’s time to do the unwrapping and sphere masking. To do this, add the higlighted nodes to the end of the node chain:
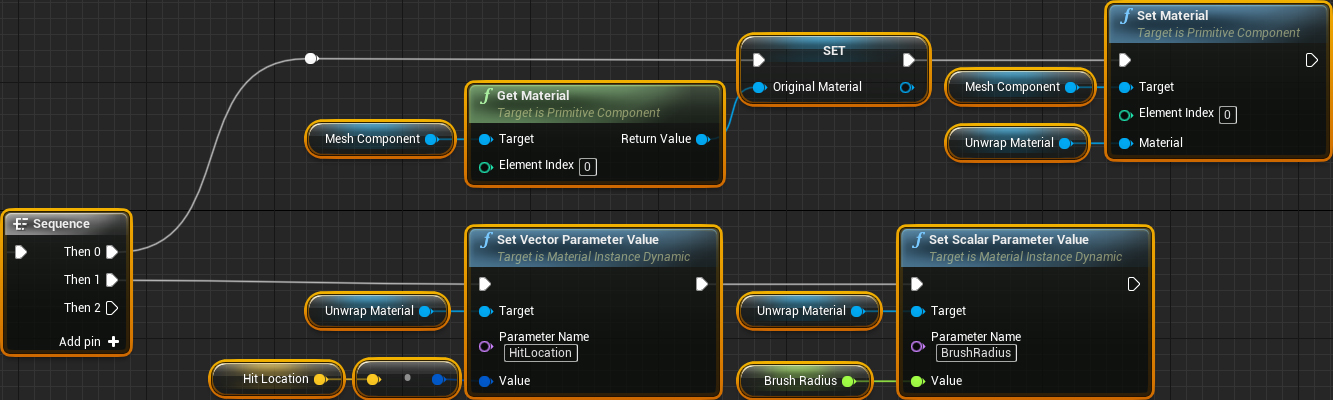
Here’s what each line does:
- First, this will save the mesh’s original material so you can reapply it later. Afterwards, it will apply the unwrap material.
- This line will pass in the hit location and brush radius to the unwrap material for sphere masking
Before you can test the unwrapping out, you will need to do a line trace from the player to get a hit location.
Getting the Hit Location
Click Compile and then go back to the main editor. Afterwards, open BP_Player. Open the Shoot function and add the highlighted nodes. For this tutorial, set Brush Radius to 10.

Click Compile and then close BP_Player. Press Play and then left-click on the character to do an unwrap and sphere mask.

If you’re wondering why the mask keeps moving, it is because parts are moving in and out of the sphere mask. This is not a problem though because you will only capture the unwrap at the time of the hit.
Now that you have unwrapped the mesh, you need to capture it.
Capturing the Unwrap
First, it’s a good idea to add an unlit black plane behind the unwrapped mesh. This will help prevent seams at the edge of UV shells. Open BP_Capture and then add a Plane component named BackgroundPlane. To save time, I have already created the black material for you. Set the material to M_Background.

For this tutorial, the unwrap and capture size are 500×500 units so the background plane will need to be at least that large. Set the Scale to (5.0, 5.0, 1.0).

Since the plane’s location and unwrap location are the same, it is also a good idea to offset the plane down to prevent any z-fighting. To do this, set Location to (0.0, 0.0, -1.0).

Next, you need to perform the capture. Go back to the PaintActor function and add the highlighted nodes:
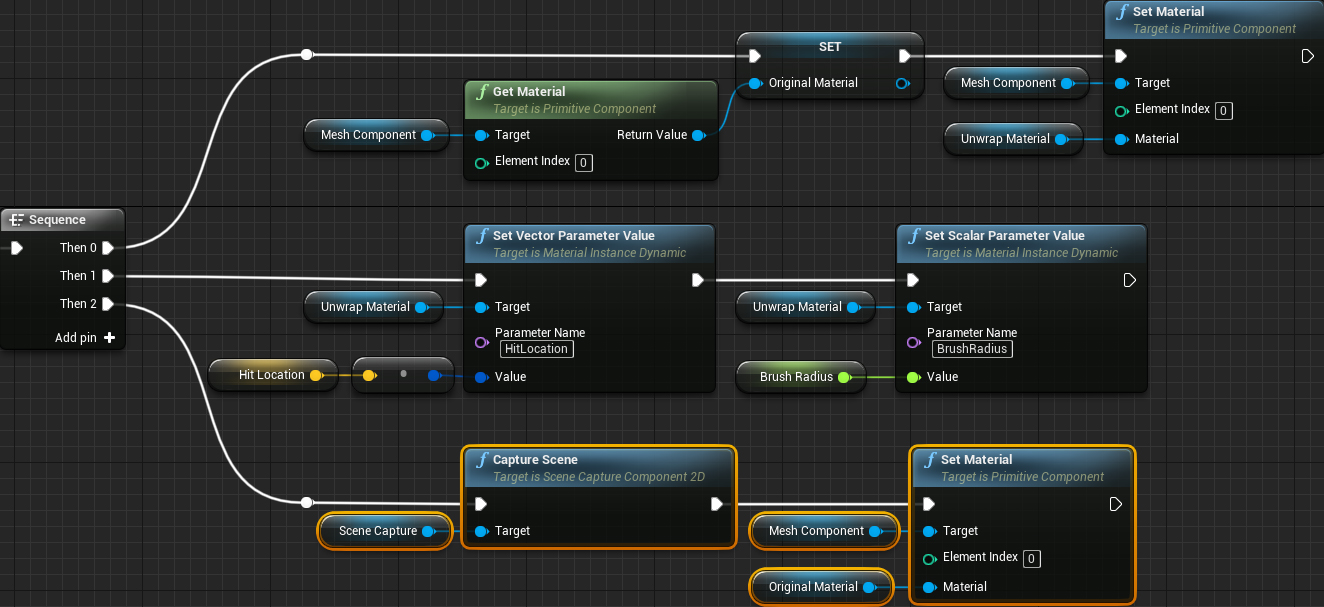
This will capture the unwrapped mesh. Afterwards, it will reapply the mesh’s original material.
Currently, the scene capture will overwrite the previous contents of the render target. To make sure the sphere masks accumulate, you need to make sure the scene capture adds to the previous contents instead. To do this, select the SceneCapture component and set Scene Capture\Composite Mode to Additive.

Click Compile and then close the Blueprint. Next, you need to use the render target in the character’s material.
Using the Mask
Navigate to Characters\Mannequin\Materials and open M_Mannequin. Afterwards, add the highlighted nodes. Make sure to set the Texture Sample to RT_Capture.

This will display red wherever the mask is white and orange wherever the mask is black. If you wanted to though, you could blend between textures or material layers instead.
Click Apply and then close the material. Press Play and left-click on the character to start painting.

Where to Go From Here?
You can download the completed project using the link at the top or bottom of this tutorial.
While you’ve only used sphere masks in this tutorial, they are not the only shapes you can use. There are boxes, cylinders, cones and more! To learn more about these shapes and how to implement them, check out these two posts:
- Modelling with Distance Functions by Inigo Quilez
- Volumetric Rendering: Signed Distance Functions by Alan Zucconi
If you’d like to check out another method of mesh painting, check out Tom Looman’s Rendering Wounds on Characters. Instead of accumulating sphere masks, he sets a fixed number of sphere masks. The advantage of this method is that it’s cheap (depending on how many sphere masks you have) and it is relatively easy to animate the masks. The disadvantage is that there is a hard limit on how many sphere masks you can do.
If there are any effects you’d like to me cover, let me know in the comments below!